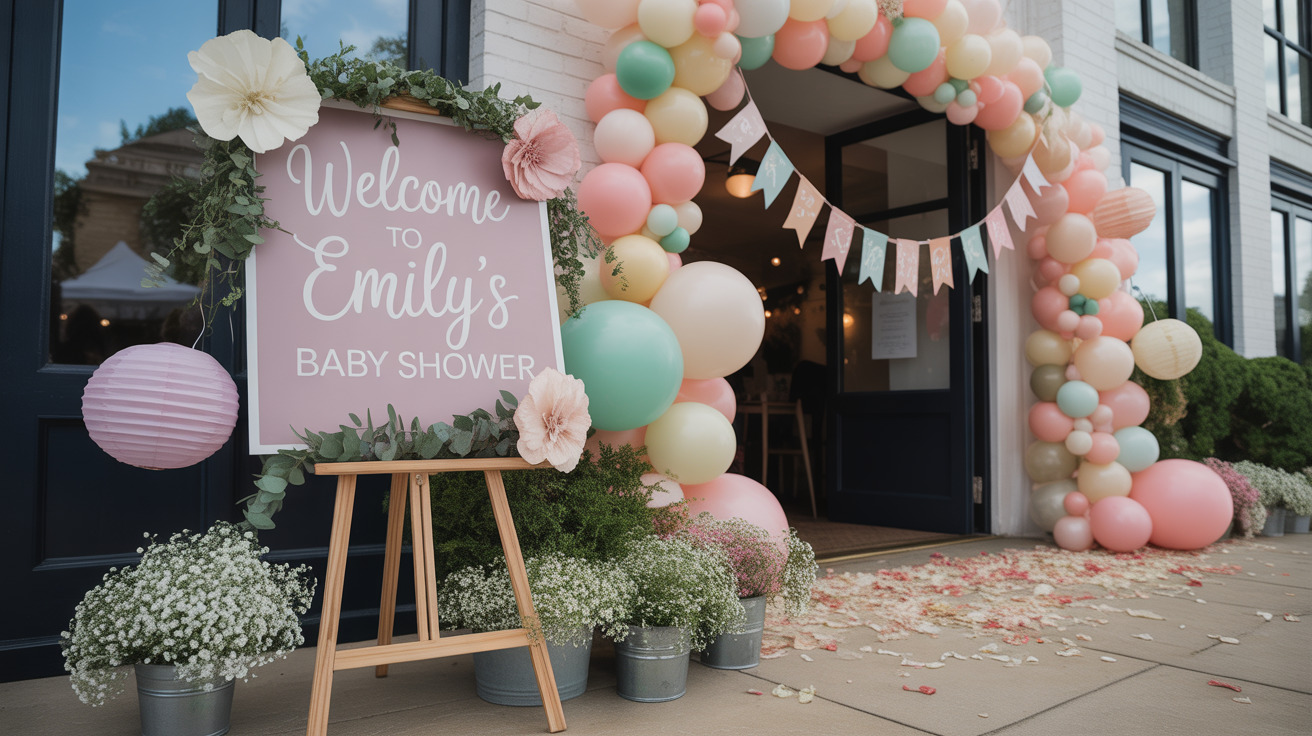
Whether you decide to host an actual Mother Blessing (Blessingway), or just use these ideas for your baby shower, here are some activity suggestions. The host and the expecting mother should pick the ones that appeal the most and that will fit into the allotted time for the celebration. This is only a partial list and you certainly are welcome to adapt these suggestions and make up your own rituals!
Ideas For Mother Blessing Rituals
- A Birthing Necklace
- Birthing Wreath or Basket
- Foot Bath
- Hair Grooming
- Belly Casting
- Belly Painting
- Wrist Binding
- Meditation Stones
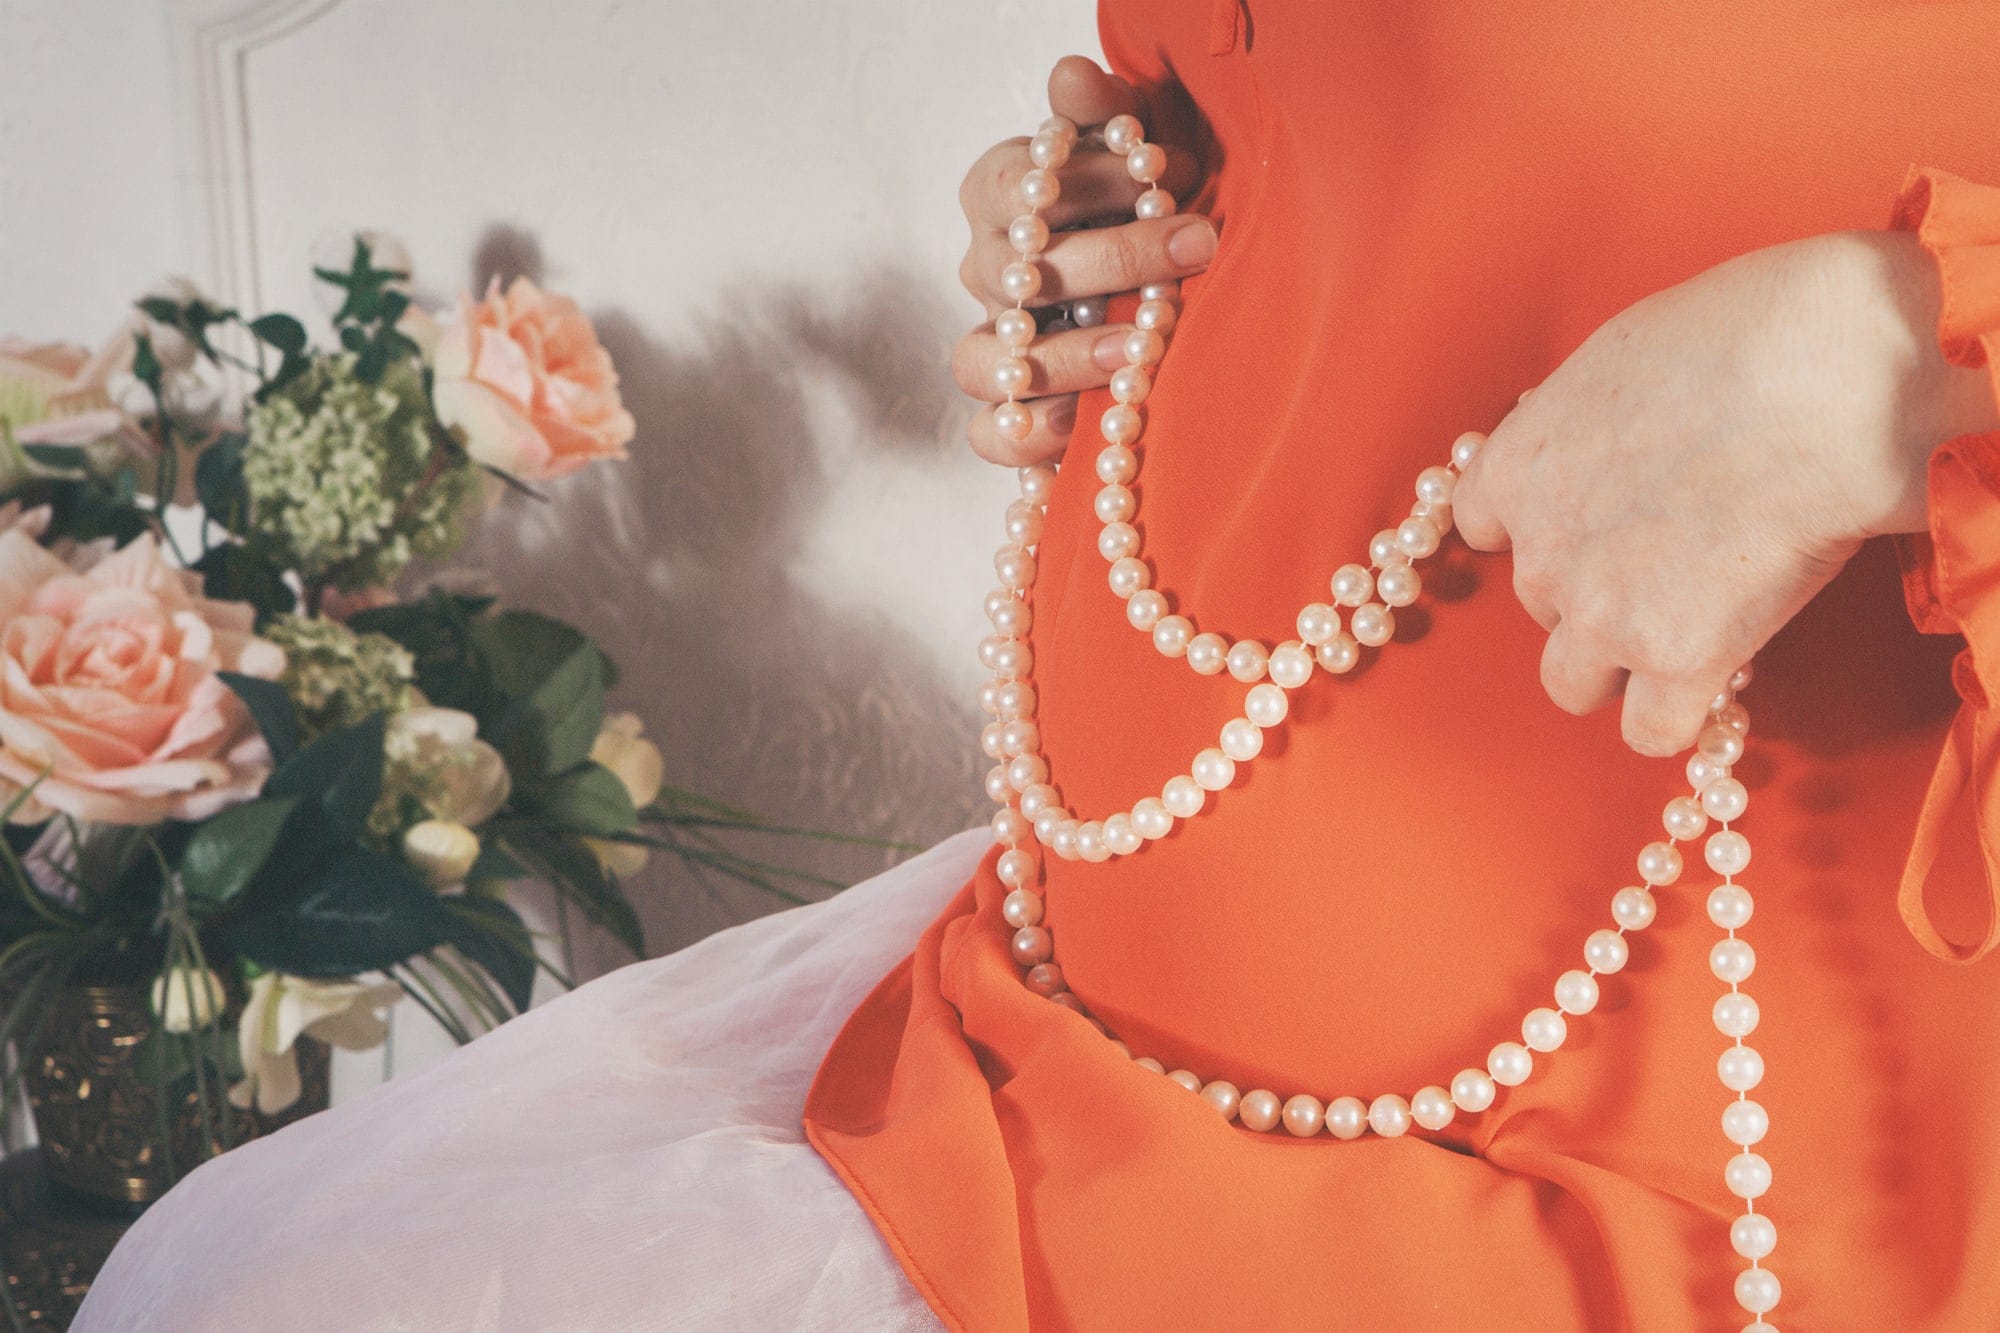
Mother Blessing Ritual: Birthing Necklace
The birthing necklace is the cornerstone of the Mother Blessing. It is intended for the mother to wear during labor to bring strength and all of the positive energy the trinkets in the necklace symbolize. If the mom-to-be does not think she will actually use or wear a birthing necklace, you can alternately create a birthing wreath or basket to have near her while she is in labor.
You will need:
- Guests who have brought beads or trinkets
- Leather, hemp, or cotton cord, from craft or bead supply store, at least 2 feet long (you can cut it to fit after all trinkets have been strung)
- Jewelry needle to thread beads onto necklace
- Small rings, craft wire, embroidery floss or ribbons to attach odd-sized beads or trinkets to necklace, from craft or beading supply store
How To Make A Birthing Necklace
On the invitation, ask each guest to bring a small trinket or bead that symbolizes their wish for the mother and baby in labor and birth. Emphasize that it will be used to make a necklace for the mother to wear during labor.
Before the Mother Blessing begins, cut a length of coated beading wire to make a full-length necklace and either tie a knot in one end, or
add a crimping bead or necklace clasp to the end. Thread the other end through a beading needle to make it easy to place the beads on it. Place the prepared necklace into a small bowl or basket so it can be passed easily around the room.
At the Mother Blessing, going clockwise around the circle, have each guest explain the significance of their bead as they place their bead on the necklace. Alternately, you can have everyone present their beads to the mother and place them in a bowl for someone string them on the necklace after the presentations. The result is a necklace full of good wishes for the mother to wear and focus on while she is in labor.
Make sure you finish the necklace with a knot or clasp before you place around the expecting mother’s neck.
Tips:
- Be prepared for people to bring very small, very large and odd-shaped trinkets that may or may not have a hole that you can attach to the necklace with. For this purpose, have some small, keyring style rings to place any small beads or odd-sized trinkets on the necklace. You may also have to get creative with some beading thread, ribbons or craft wire to attach certain beads or trinkets. Just keep in mind that it is supposed to be worn, so make sure that there are no sharp wires sticking out anywhere. Mom will be in enough pain from the labor contractions!
- Emphasize on the invitation that the Birthing Necklace is meant to be worn during labor. I thought I had made that clear on my invitation, but our guests were surprised to learn that, yes, indeed, we were making an actual necklace to wear during labor. Some of them had brought some very well-intentioned pieces that just didn’t work on a necklace — especially one to be worn during the thrashing about of child labor! Emphasis on the “necklace to be worn during labor” may help reduce the number of odd-shaped and cumbersome-sized pieces. If you do receive some odd trinkets, put them on the necklace anyway. You do not want to break the chain of positive energy!

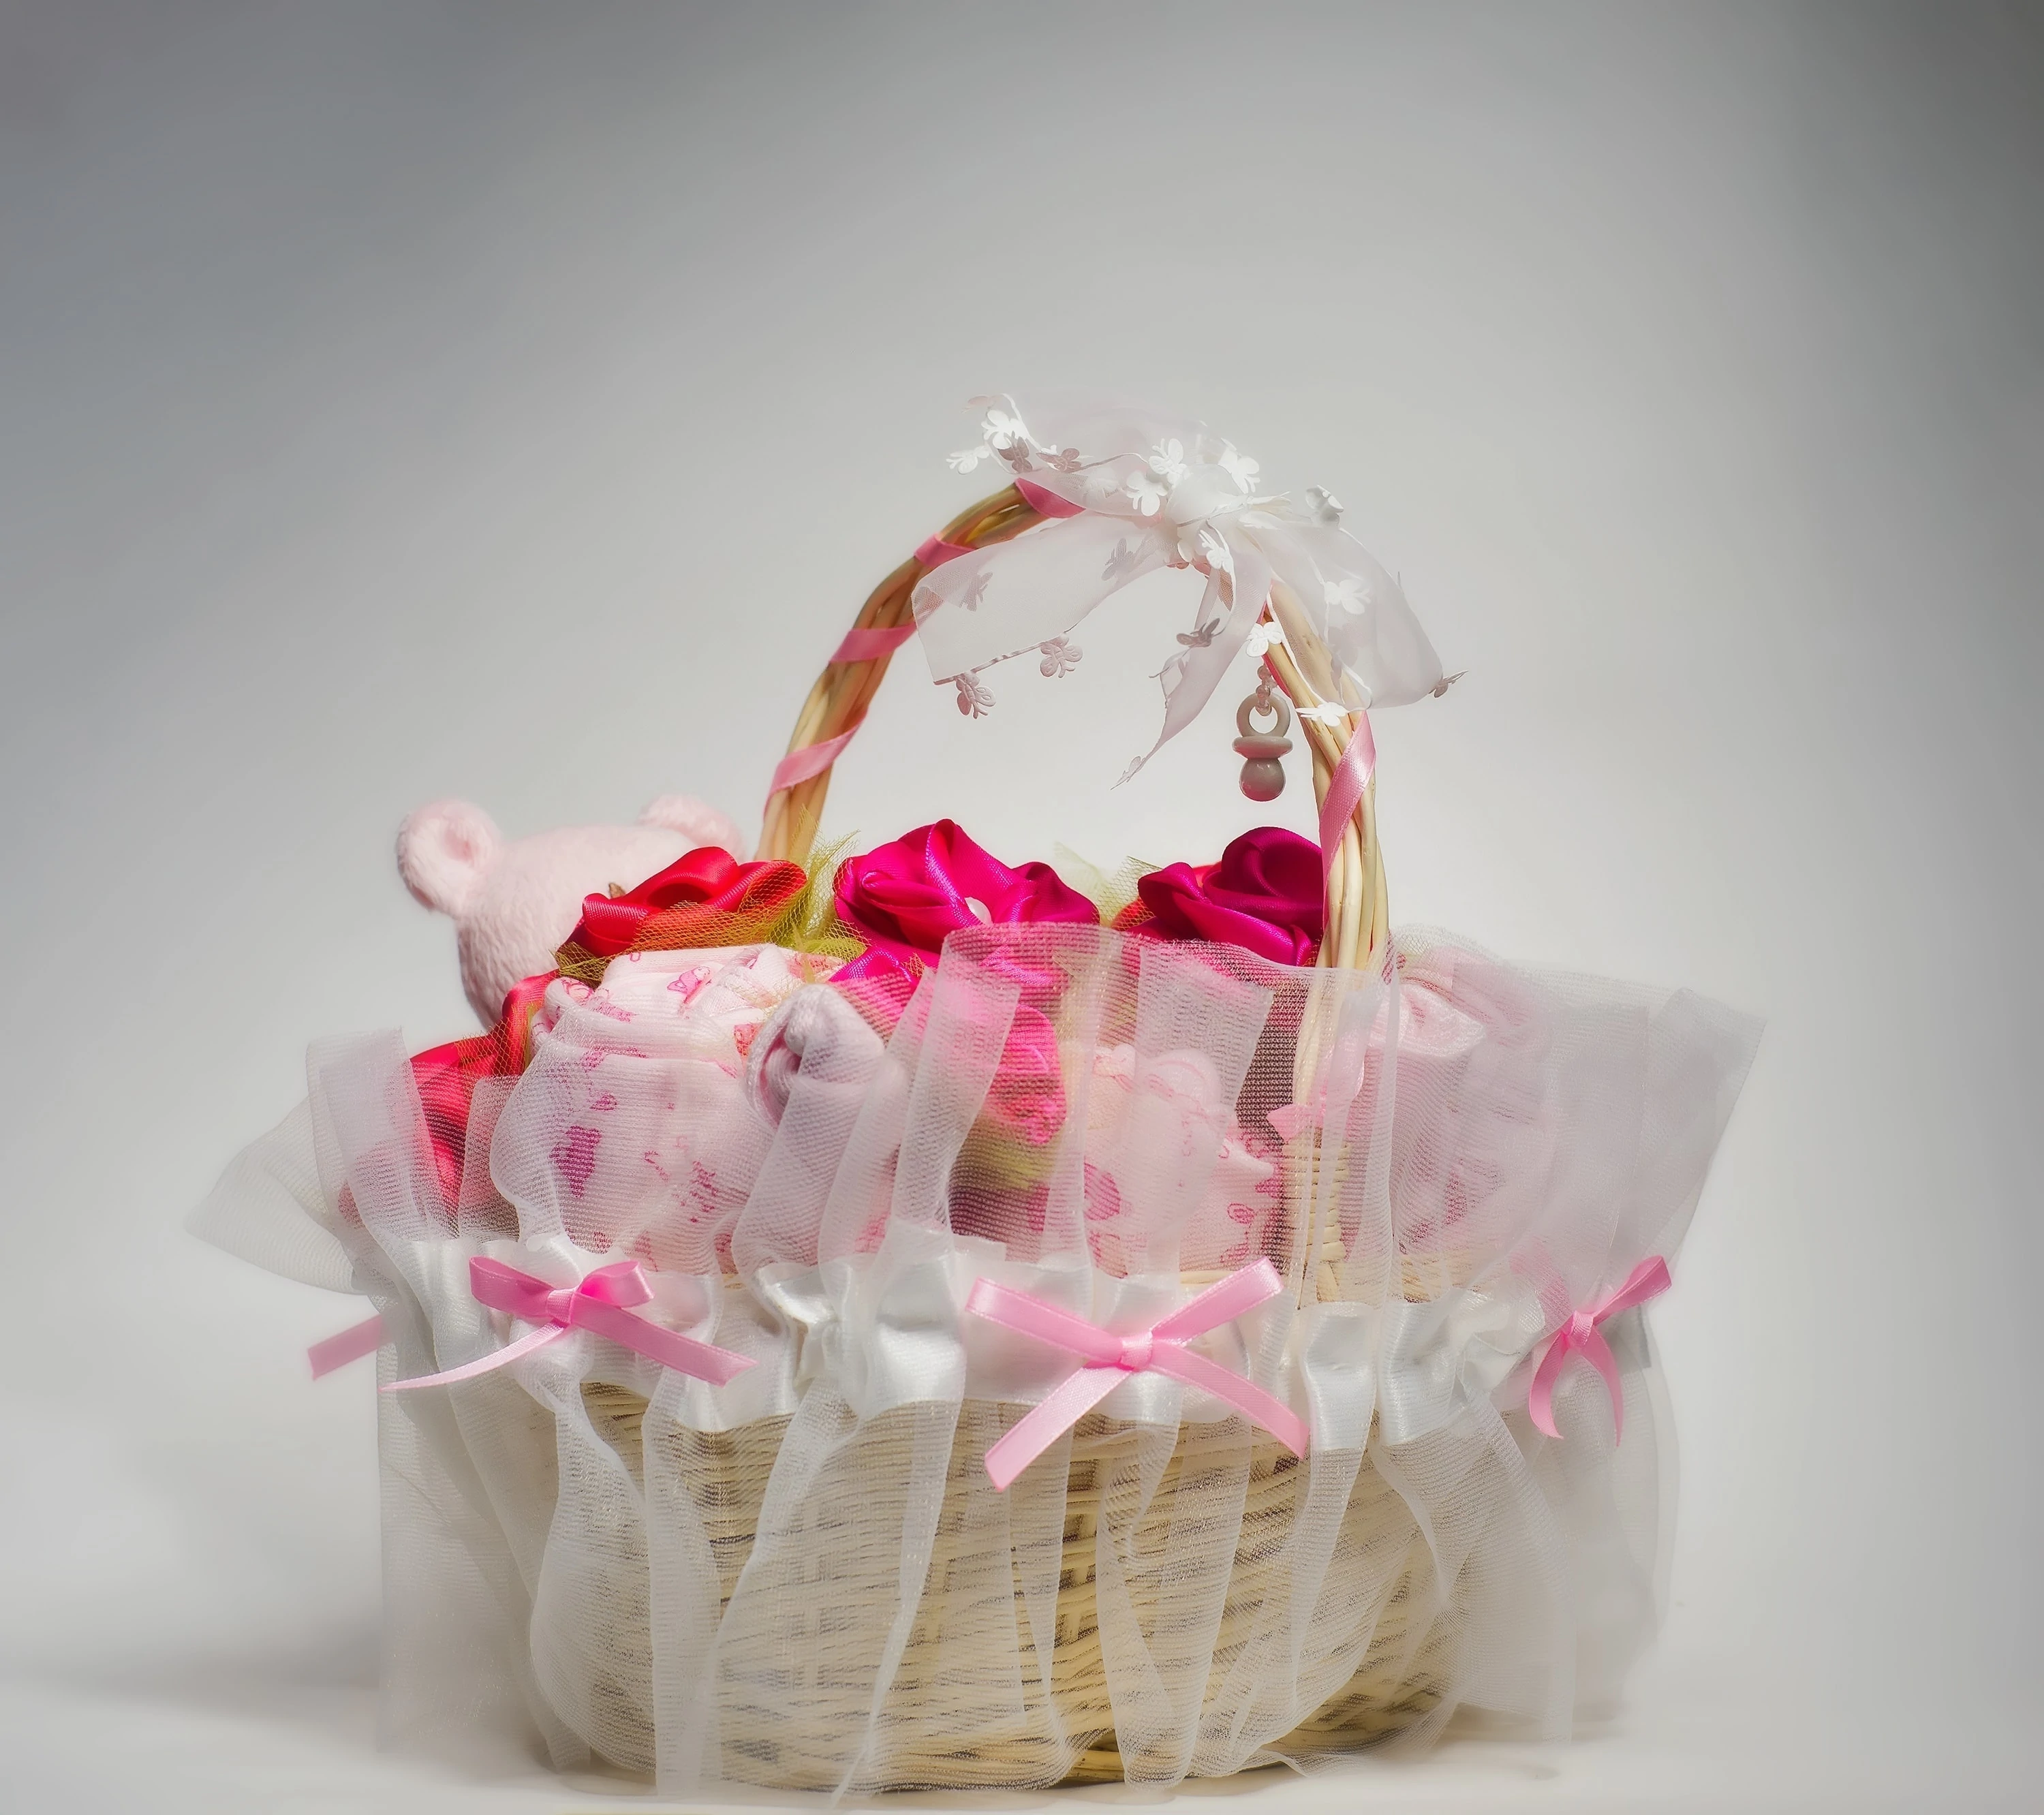
Mother Blessing Ritual: Birthing Wreath or Basket
The creation of a birthing wreath or basket can be done in place of the Birthing Necklace or in addition to it. You can either make your own wreath or buy one from a craft store. If you choose to do a basket, you most likely will want to buy one. Whether it is a basket or wreath, it should be made from natural materials, ideally.
You will need:
- Guests who have brought beads or trinkets OR
- Small slips of paper nice paper (such as scrapbook paper) and pens
- A natural fiber wreath or basket, from a craft supply store
- Craft wire, beading thread or ribbons to attach trinkets or wishes to wreath or basket
How To Make A Birthing Wreath or Basket
If you wish to decorate the wreath with trinkets, on the invitation, ask each guest to bring a small trinket or bead that symbolizes their
wish for the mother and baby in labor and birth. If you are already doing a birthing necklace and do not want guests to have to bring two trinkets, you can simply have guests write their wishes on a slip of paper and attach that to the wreath. You can always have some paper and ribbons on hand so that if any guests forget to bring a trinket they can still participate in this activity.
At the Mother Blessing, going clockwise around the circle, have each guest explain the significance of their bead or share their wish they have written on paper and then attach the trinket or paper to the wreath. The result is a wreath or basket full of good wishes for the mother to focus on while she is in labor. A wreath should be hung in the room where the mother plans to do most of her laboring, in a spot where she will easily be able to view it.
Tips:
- If the expecting mother is planning to give birth at a hospital or birthing center, a basket may be more practical as it can be carried more easily and be set down on a table or chair (the hospital probably isn’t going to let you hang a wreath in the labor room!). A basket can also be packed with other labor easing items such as aromatherapy misters and labor-friendly aromatherapy essential oils to bring to the hospital.
- You can decorate the wreath or basket with beads and trinkets that your guests have brought OR you can have them write a wish for the mother’s labor on a small slip of paper (with a hole punched in it) and tie those to the basket or wreath with a ribbon.
- If you are using paper wishes, as you have your guests write their wishes on paper, make sure you point out that they will be expected to read their wish aloud to the group.
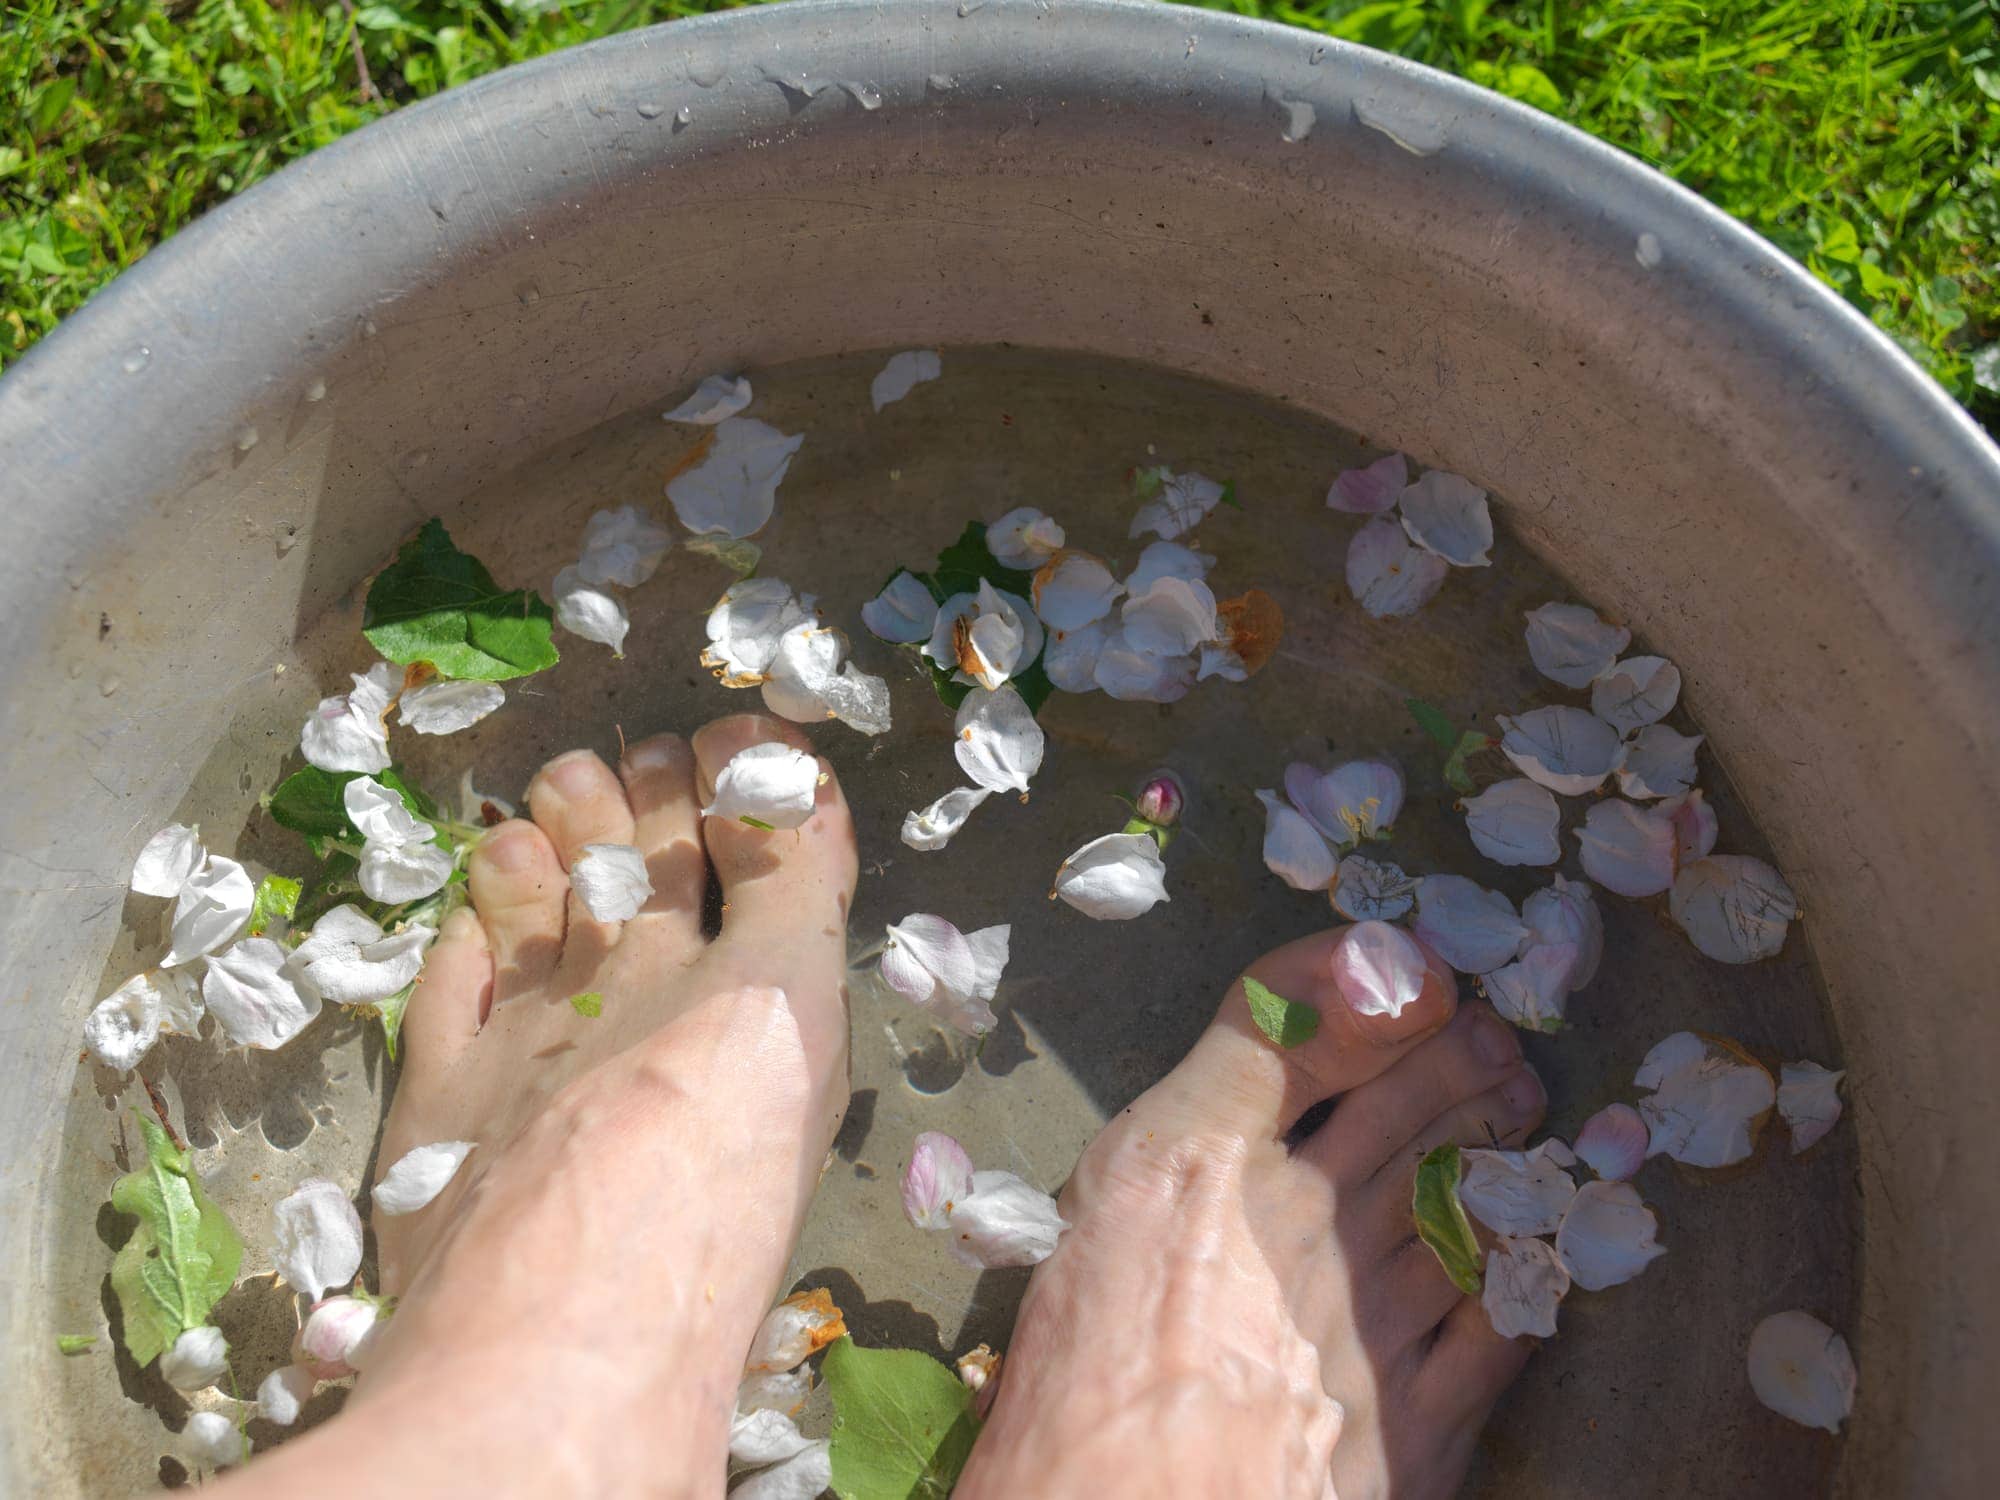
Mother Blessing Grooming Ritual: Foot Bath
Help mom relax with a foot bath from you and anyone who wants to help out. This can be done as a group or off to the side while guests eat or engage in other Mother Blessing activities.
You will need:
- Dishpan Tub of warm water
- Flower petals or essential oil for water:
- rose petals, lavender buds, calendula, mint, lemon balm
- rose essential oil, lavender essential oil
- Towels
- Nail clippers
- Pumice stone or salt glow scrub
- Mild Soap
- Unscented Massage oil
- Cornmeal (optional)
- Mild moisturizer
How To Give A Foot Bath
- Fill a dishpan basin with warm water and fragrance the water with flower petals
- To start the foot bath first let both feet soak in the warm water for a minute or so. As you work through the foot bath, remember to work on one foot and let the other one continue to soak.
- Lather up the bar of soap and work on one foot while the other foot continues to soak.
- Place the first foot back in the water and wash the second foot
- Make sure both feet are completely rinsed off
- If mom has been having trouble reaching her toe nails, grab some nail clippers and trim them for her

- Massage each foot with some gentle pregnancy-friendly massage oil. Do one foot at a time while the other one soaks in the water.
- Rub a little oil onto your hands and very gently, begin at the heel (or even her calf) and slowly work your way to her toes in small circles.
- Massage each toe individually.
- Stroke your finger along each toe bone from her ankle to her toes
- Do the same thing for the spaces between her toe bones, ending at the spaces between toes and separating the toes
- Then do some nice long strokes with both hands from her calf to her toes
- If she has any requests, follow them, but remember to be very gentle
- Next, exfoliate the feet with some bath crystals, salt glow scrub or even a pumice stone. Rub gently in small circles giving extra attention to the heels and any other rough skin spots.
- After exfoliation, rinse both feet thoroughly and take both feet out of the water.
- You can dry each foot with a towel or use cornmeal to dry the feet. Drying the feet with cornmeal will impart a nice glow that is symbolic of luck and protection as she walks along her path.
- Moisturize each foot
Any extra supplies would make a great gift to the expecting mom — make sure her partner knows how to use them!
Notes:
- Keep in mind that not all herbs and essential oils used in grooming products are suitable for pregnancy. It is safest to err on the side of using unscented products, although lavender and rose are generally considered safe for the third trimester of pregnancy. If the mother-to-be is having any complications OR if you plan to use any products that contain herbs and essential oils other than rose or lavender, make sure you discuss the foot bath and the products you intend to use with her doctor or midwife first.
- Mention your intention to give a foot bath ahead of time so the expecting mom knows not to wear pantyhose or tights!
Mother Blessing Hair Grooming Ritual
Hair grooming is another cornerstone of the Mother Blessing tradition. Get out a nice natural bristle hairbrush and give the new mom a relaxing hair brushing. You can finish it off by decorating her hair with flowers.
You will need:
- (Natural Bristle) Hair Brush
- If you like, you can put a couple drops of rose or lavender essential oil on the brush for an aromatherapy effect
- Optional Hair Decorations:
- Fresh picked flowers
- Hair pins, hair combs, ribbons, etc
What to do
I hope this is as self-explanatory as it sounds! Fully brush her hair, massage her temples, stimulate her scalp. You can leave her hair down, put it up, or style it according to her wishes. Then decorate her hair with flowers, ribbons, hair combs or even a crown of flowers. If you have two or more people who want to be part of the grooming rituals, you can have one or more people groom her hair while others give her a foot bath.
You can make a crown of flowers by starting with crafting or florist wire. Braid three strands of crafting wire leaving spaces in the braids for the flowers. Fashion the braid into a circle that will fit the mother’s head comfortably. Tie ends together with a ribbon. Then insert the flowers into the braids of wire. Or, for a simpler crown that probably won’t last as long, you can simply cut a small slit in the flower stems and chain them together, as in a daisy chain.
[cboxarea id=”cbox-G0QoQ6qCd2STDLwY”]
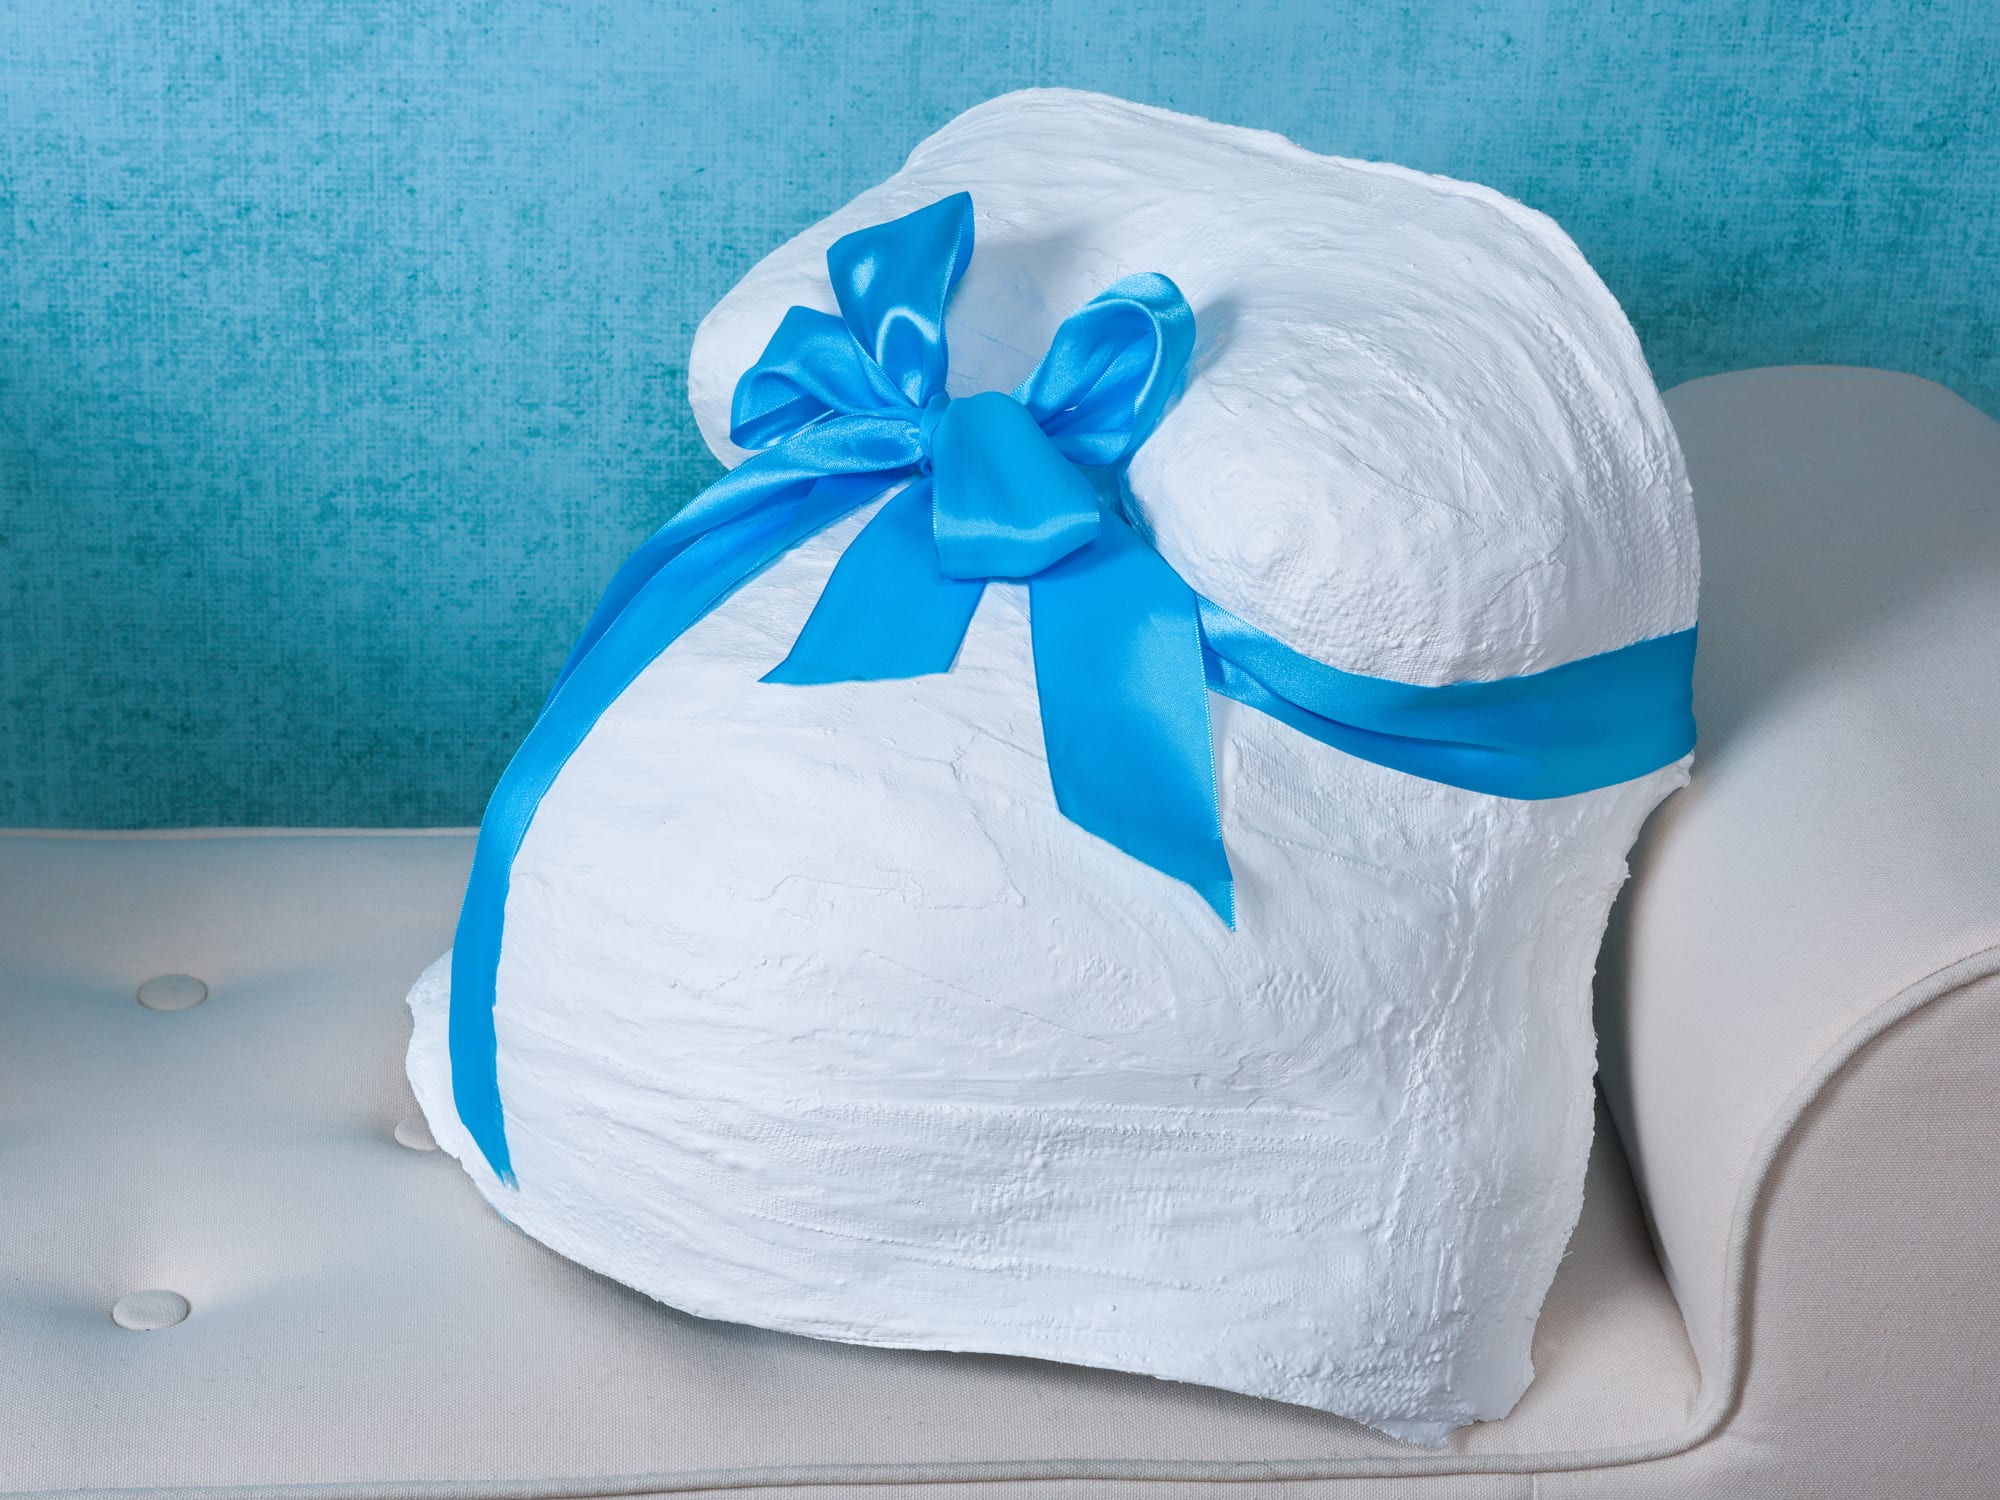
Make A Belly Cast for your Mother Blessing
Belly casting is an excellent way to preserve your pregnant belly in 3D and once the cast is set, you can decorate it! I am writing this editorial based on my own experience making a belly cast and from tips from friends who have done it too. There are many resources online where you can purchase a Belly Casting Kit, or even hire an artist to help you. Since belly casting requires bearing most of your torso, this may be best done in a small Mother Blessing. You can also make the cast ahead of time and decorate it at the Mother Blessing.
If a kit or artist sounds expensive, all you really need is:
- impregnated plaster of paris strips (from a craft or art supply store) — at least two packages
- some petroleum jelly or cocoa butter (to lubricate mom’s skin)
- a bucket or bin of water
- a big tarp, plastic sheet or old bed sheet
How To Make A Belly Cast
- Cut the Plaster of Paris Strips
Unroll the impregnated plaster of paris strips and cut them into lengths that will cover the expecting mother’s belly. You will also need some strips for her sides and to criss-cross between her breasts (assuming you are including her breasts in the cast) - Prepare the Casting Area
A garage or basement is probably the ideal place to do a belly cast, unless you like cleaning plaster of paris out of your carpet. Lay down a tarp, plastic sheet, old bed sheet or layers of newspaper. Place a comfortable, but not fancy or expensive, chair in the center. If you like, cover the chair with a sheet too. Fill the bucket with warm water and place it near the chair. Have the cut plaster of paris strips nearby. Also, prepare an area where you will be able to leave the fresh cast to set overnight. - Prepare the Pregnant Lady
If she is modest, you should create the cast before the Mother Blessing. To get a good cast of the entire belly, she really should only wear an old pair of underwear (as in ready to be thrown away anyway) to keep plaster of paris out of her pubic region. Use a generous amount of petroleum jelly or cocoa butter moisturizer to lubricate her belly and chest and any other body parts you want to include in the cast (but don’t use too much as the plaster of paris strips may slip off). Don’t forget to get under her belly too. Get her comfortable in the chair and use another sheet to cover her legs and shoulders that aren’t being cast. You are welcome to get artistic about the position to make a belly cast in, but remember that the subject is pregnant and will have to remain comfortably in that position until the cast has set. - The Goopy Mess
Following the impregnated plastic of paris strips package directions, dip the plaster of paris strips into the bucket of water and apply them to the expecting mother. I recommend starting by placing two strips vertically from her arm pits to her hips as side bars for the cast. Then, criss-cross at least two strips between her breasts (or across them if she is large breasted). Next, apply the strips around her belly, making sure to overlap them sufficiently. Start at the bottom of her belly and continue up until you have covered her belly and breasts. Dip your hands in the water and spread the plaster evenly around her belly, smoothing out the strips. Repeat for a second layer. Mom will start to feel the inside of the cast drying, so work quickly to keep the first layer from drying too much before you get the second layer going. To finish ,neatly tuck in the sides and edges, making sure they will be smooth when the cast is removed. Dip your hands in the water and smooth the plaster over the strips once again, making sure that everything is nice and smooth over her belly and breasts. - The long wait
Now wash your hands and go get mom a nice cup of water with a straw so she can relax while you wait for the cast to harden. If you are her birthing partner, this will be good practice for remembering to keep her hydrated while she is in labor and putting up with her being cranky even though you are being really nice to her. Read the plaster of paris strips package directions as to how long it will take for the cast to set before it can be removed. When it is time, carefully pull the cast away from mom’s body — now we will find out how good of a job lubricating her belly you did! - Running for the shower
Lay the fresh cast down on newspaper to harden somewhere where it won’t get bothered by pets or other children. At this point, you should lay it down, “belly up”, and not try to display it. Tuck in or cut off any rough edges. Follow package directions for time to let it set.Now that you have the fresh cast set aside, help mom out of the chair. Get an old towel wet and try to get as much of the plaster off her as you can while she is still standing on the tarp or plastic sheet. Help her remove the old panties and throw them out. Help mom get to the shower without dripping too much plaster all over the place. - Decorating
Even a plain old belly cast is still astonishing, so you do not have to go any further. But if you like you can paint it with acrylic paints or decorate it with flowers, stones, shells, beads and even lacquer it for extra protection. This can make a fun Mother Blessing activity that doesn’t compromise the modesty of the expecting mom. If you use varnish around pregnant people, make sure it is in a well ventilated area or even outdoors.
Good luck and have fun!
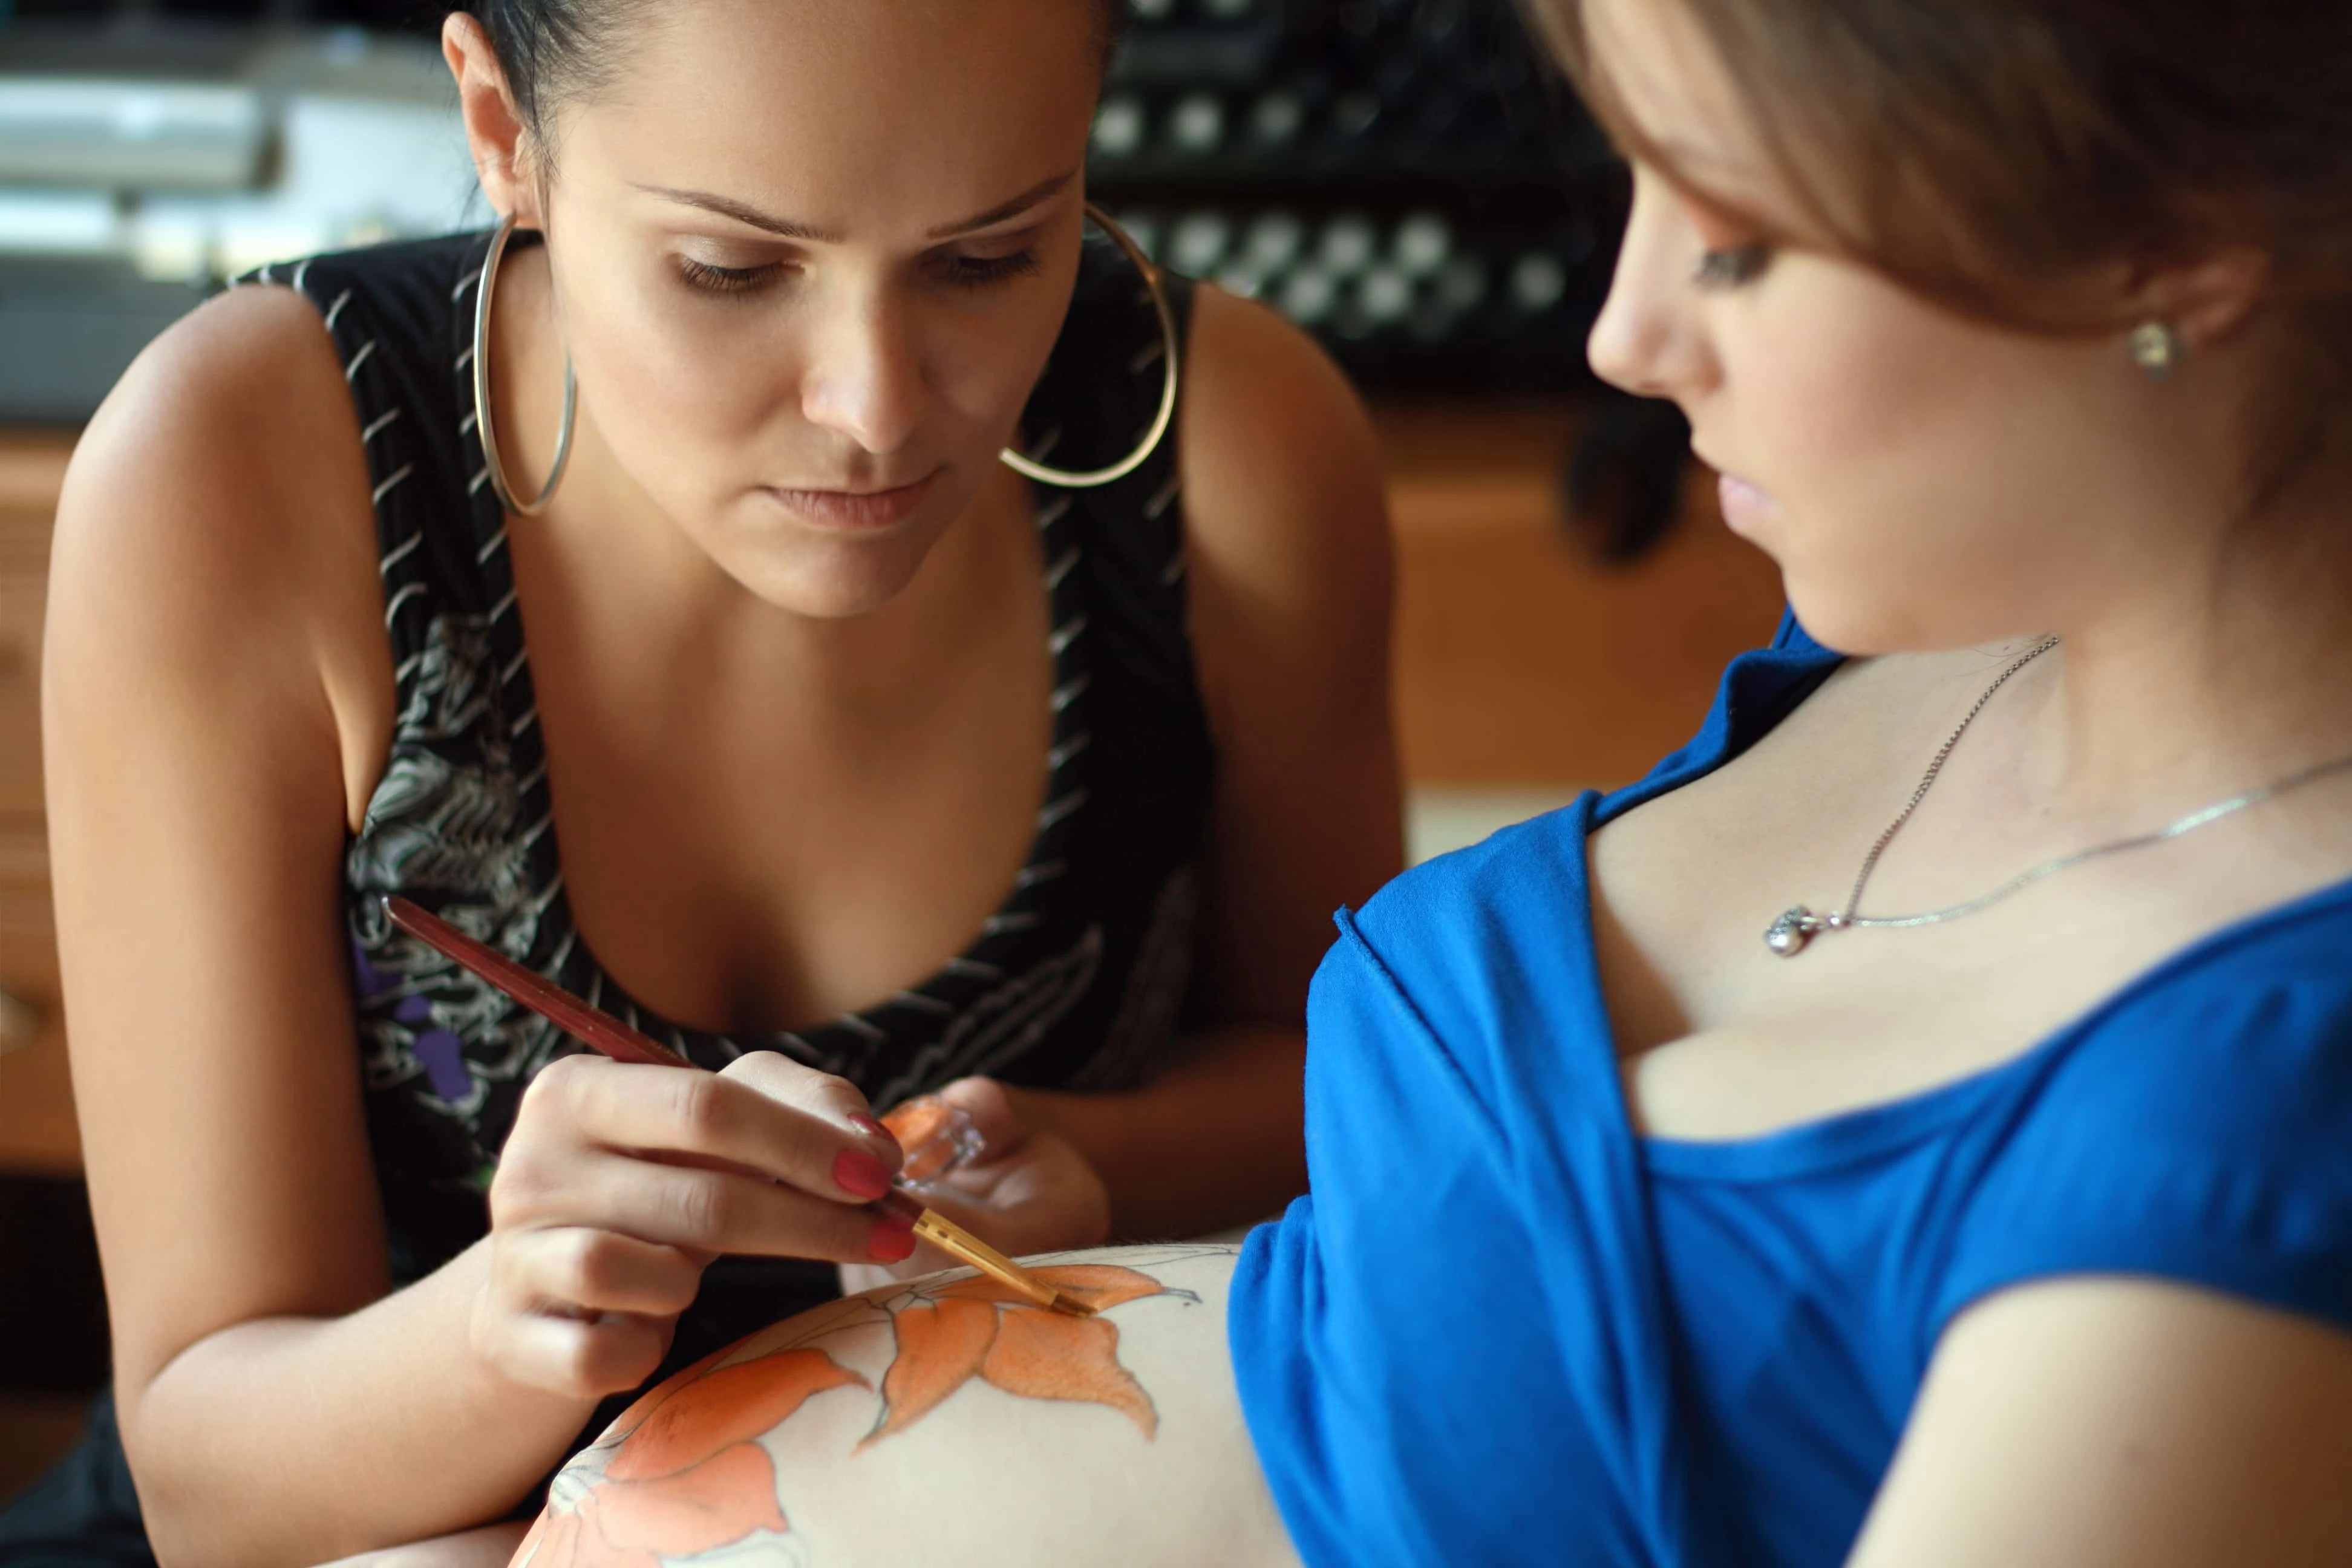
Mother Blessing Ritual: Belly Painting
Belly painting can be a fun way to celebrate momma’s big belly without going to the hassle of making a full-blown belly cast at a Mother Blessing. Traditionally, henna has been used to decorate a pregnant woman’s belly to distract her while she is in labor — so give her something fun to look at!
You will need:
- Non-toxic body paints* OR
- Natural Henna “tattoo” kit*
- A Camera
- Comfy chair for mom to sit in while everyone paints her belly
How to paint a belly:
I hope this is pretty self-explanatory. Read and follow the package directions for either the body paints or henna. Use stencils or go freehand … you can decide on a theme or just let everyone decorate!
Decorating suggestions include:
- sun
- stars
- moon
- sky
- flowers
- animals
- Asian or middle east characters or symbols
- female symbol
- fetus in utero
- plus spirals & art deco flourishes.
Make sure you take a picture to preserve your temporary work of art!
Notes:
- *Please do a patch test at least 24 hours before the Mother Blessing to make sure mom isn’t sensitive to body paints and/or henna.
- Make sure you mention your intention to do a belly painting to the expecting mother so she knows to wear a separate top & bottom (skirt or pants). Dresses are not conducive to exposing that pregnant belly and decorating it!
Mother Blessing Ritual: Wrist Binding
This ritual is tremendously powerful. I find that it makes a nice conclusion to the main part of a Mother Blessing as everyone is joined together and then cut apart.
You will need:
- A new package of cotton or hemp jewelry cord or yarn
- You will need one long, unbroken piece of cord
- You will need about 10 feet or more if you have a lot of guests
- If you have a nice long piece of jewelry cord leftover from making a birthing necklace, it will do nicely!
- However, do not use anything too strong as you will need to be able to cut it using one hand and you want it to be comfortable to wear.
- Scissors
How To Perform the Wrist Binding Ritual
Have everyone, including the expecting mother, stand in a tight circle. Each guest should wrap the cord around the wrist of the person to their left and say “From women, we are born into this circle, From women we are born into this world.” When everyone is linked together, everyone should hold hands and make a wish for an easy birth. You can also sing a song here. After the wishes and songs, pass a pair of scissors around the circle and have each person cut the person to their left enough of the cord to keep wrapped around their wrist, plus enough to tie it. If the cord is made of natural fibers (wool, hemp or cotton), make sure you leave the bracelet loose as it will shrink when you wash your hands and shower. Everyone should be instructed to keep making their wish whenever they look down at their bracelet and keep wearing the bracelets until the baby is born.
Tips:
- Since you will have one hand “tied” in the circle, have the scissors handy near where you will make the circle. We once had to waddle as a group over to a pair of scissors!
- If any of your guests have occupations where they cannot wear jewelry or other “distractions” on their hands or wrists, it is OK for them to move the cord to their ankle and wear it there.
- I would not recommend using embroidery floss or any type of light string. If the baby is late, the floss will get really tattered and even fall apart.
Mother Blessing Ritual: Meditation Stones
Have each guest decorate a stone with their wish for the mother while she is in labor. After they dry, each guest can present her stone to the expecting mother and explain her wish. The mom-to-be can use the stones to concentrate on and find strength from the wishes they represent while she is in labor.
You will need:
- Palm-sized flat stones (from rock bed or craft store)
- Paints & brushes (from craft or art supply store)
- Spray Varnish (from a craft store)
- A box or basket to hold the stones
- A table or area for painting and an area where the paint can dry undisturbed
What to do
Everyone should pick a stone and paint it with a word or symbol that represents their wish for the expecting mother while she is in labor. Allow the painted stones to air dry and, if time permits, use a spray varnish or other protective layer to keep the paints from chipping off. Make sure you do this in a well-ventilated area, away from any pregnant people!
If you like, you can have each person present their stone to the expecting mother and explain what their wish is.